MMC
MMC is a CPU which configures and manages various aspects of Sayma AMC to operate correctly in MicroTCA crate. Its main tasks are:
communication with MCH,
negotiating payload power,
enabling various on-board power supplies,
monitoring stability of on-board power supplies,
managing hotswap abilities,
supplying sensor information via IPMB.
MMC boot
During boot MMC performs several tasks:
configures CPU, UART from own FLASH
sets IO port directions
configures I2C switch base address for master ports - MMC, FPGA
communicates with MCH and asks for payload power if hotswap handle is inserted
enables power supplies in sequence described in power supply section
checks if RTM is inserted, if yes, then enables its power
Note
Configuration of CPU, UART does not affect any of LED indicators.
Compiling firmware
Source code of OpenMMC is located here. Currently “sayma-devel” branch is used.
Cmake
Compiling under Linux using cmake toolchain is the preferred option.
Clone or download git repository and checkout sayma-devel branch. Then:
mkdir build && cd build
cmake ../ -DBOARD=sayma -DBOARD_RTM=sayma -DTARGET_CONTROLLER=LPC1776 -DCMAKE_BUILD_TYPE=Debug
make
Minimal Dockerfile which downloads and compiles firmware:
FROM ubuntu:20.04

RUN DEBIAN_FRONTEND=noninteractive apt-get update && \
        DEBIAN_FRONTEND=noninteractive apt-get upgrade -y && \
        DEBIAN_FRONTEND=noninteractive apt-get install -y gcc-arm-none-eabi cmake git

RUN git clone https://github.com/sinara-hw/openMMC.git && \
        cd openMMC && git checkout sayma-devel

ENV CC="arm-none-eabi-gcc"
ENV CXX="arm-none-eabi-g++"

RUN cd openMMC && mkdir build && cd build && \
        cmake ../ -DBOARD=sayma -DBOARD_RTM=sayma -DTARGET_CONTROLLER=LPC1776 \
                -DCMAKE_BUILD_TYPE=Debug -DCMAKE_C_COMPILER_WORKS=1 \
                -DCMAKE_CXX_COMPILER_WORKS=1 && \
        make

ENTRYPOINT ["/bin/bash"]
You can use it as a reference to configure your system for compilation.
MCUXpresso
To compile binaries newest version of MCUXpresso is needed. Also install cmake from Cmake website if using windows or from your package manager if using Linux.
Steps to import and compile project in MCUXpresso are shown below. Version 11.4.0 was used.
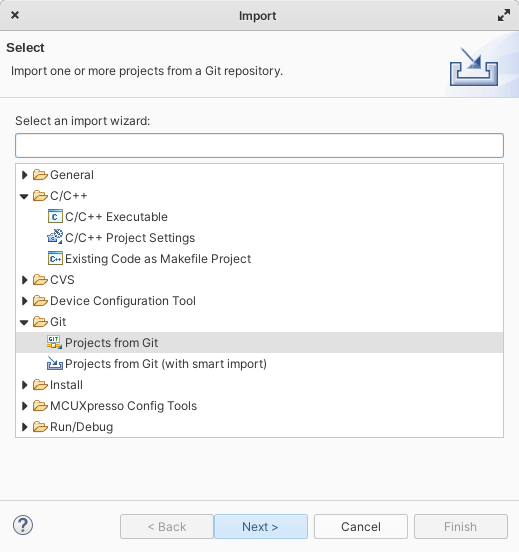
From menu choose “File” -> “Import”
Choose “Git” -> “Projects from Git”
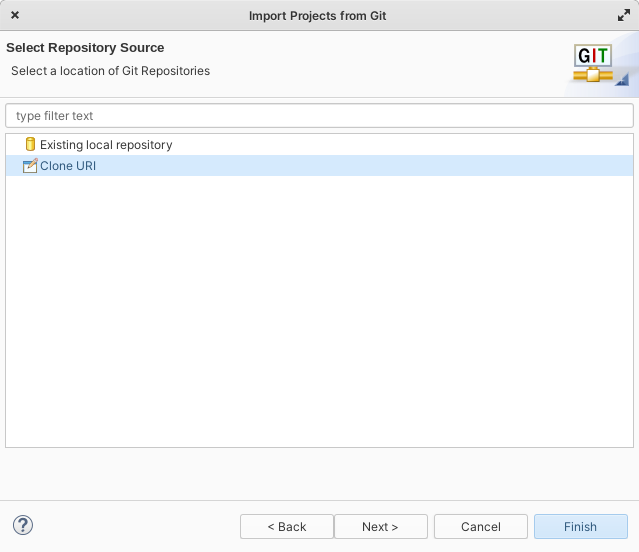
Select “Clone URI”
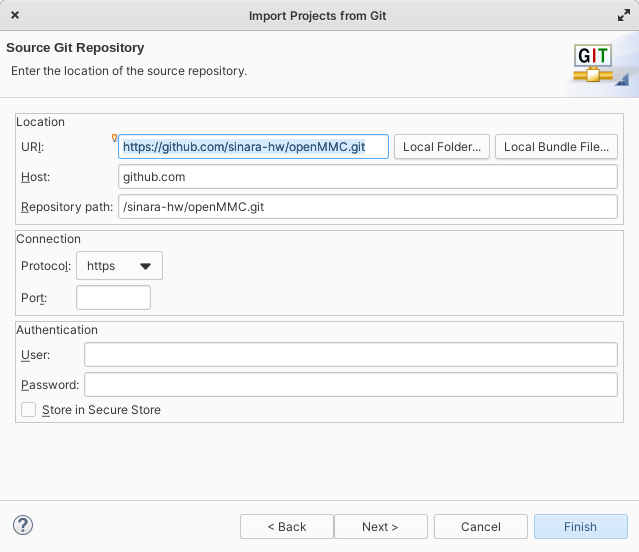
Paste address of OpenMMC repository
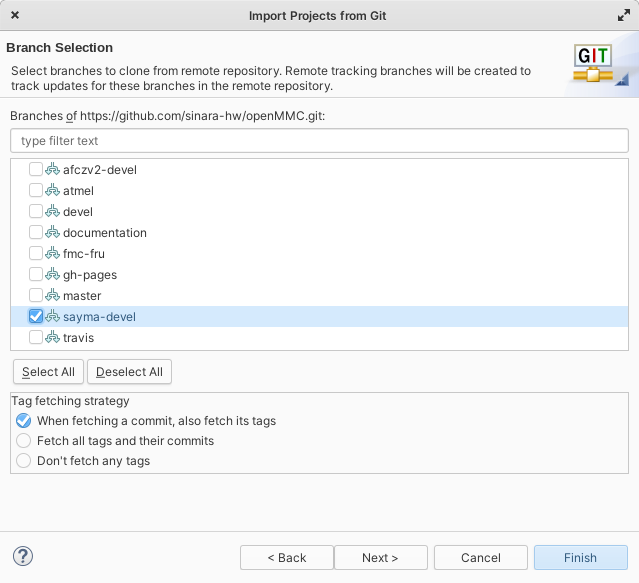
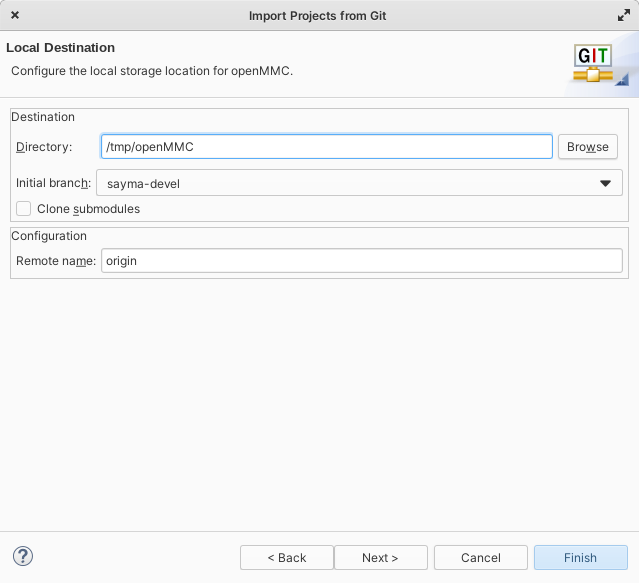
Select only
sayma-develbranch
Select directory where to store project
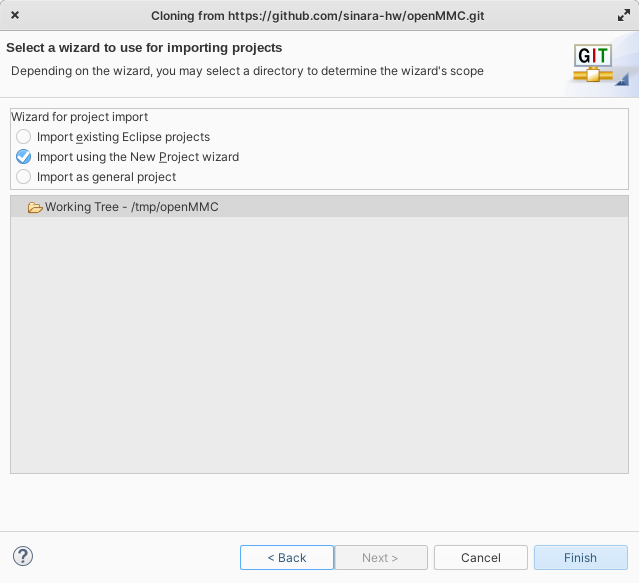
Import using the new project wizard
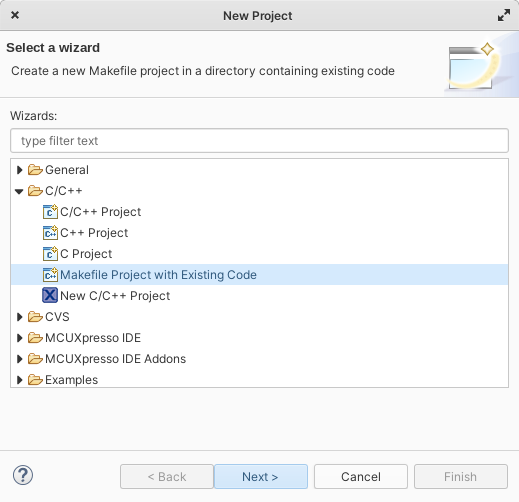
Select C/C++ -> Makefile Project with existing code
Select toolchain “NXP MCU Tools”, Only set “C” in languages, select existing code location to one you specified earlier
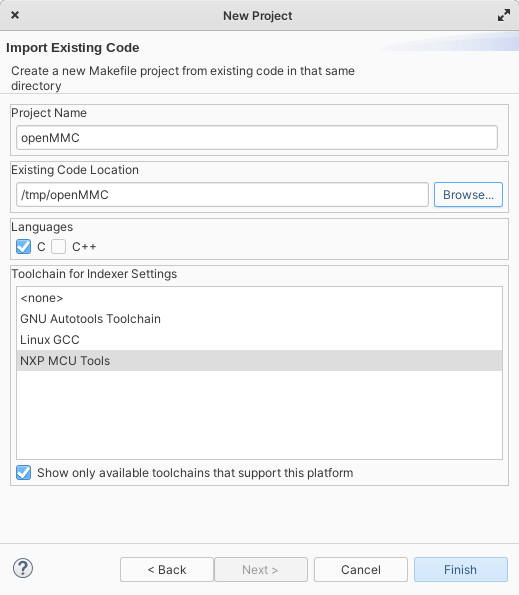
Click
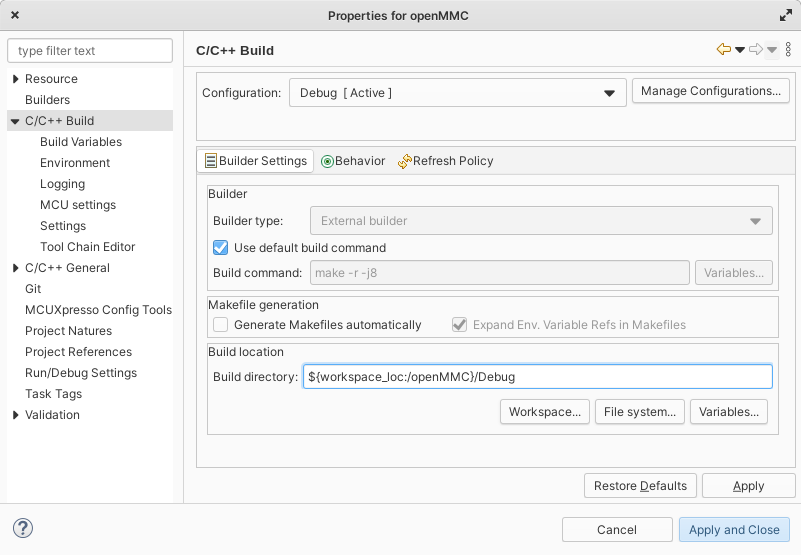
Finish.Right-click project in project explorer -> Properties
Select C/C++ build -> select build location (e.g
${workspace_loc:/openMMC}/Debug)
Select C/C++ build -> MCU settings -> select LPC1776 in “preinstalled MCUs”
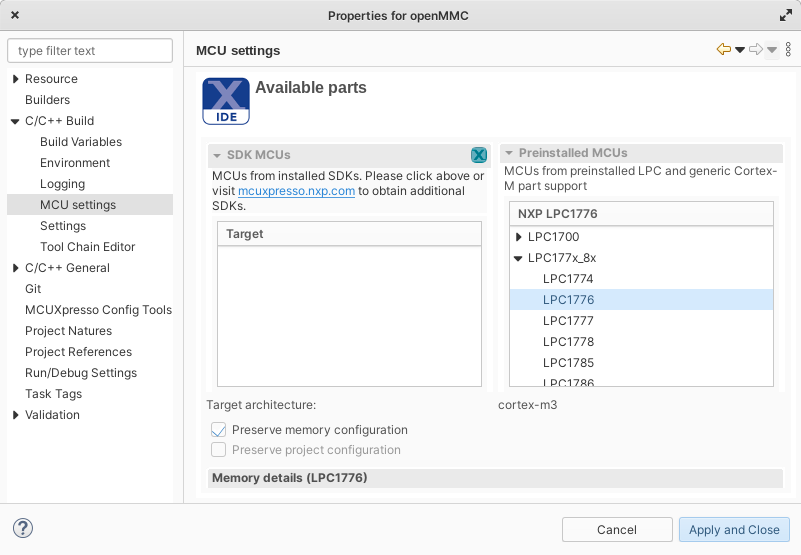
Click
Apply and Closebutton.Open
Debugfolder in console (create it in project folder if needed) and runcmake ../ -DBOARD=sayma -DBOARD_RTM=sayma -DTARGET_CONTROLLER=LPC1776 -DCMAKE_BUILD_TYPE=Debug
pawel@WI-3-14:/tmp/openMMC$ mkdir Debug
pawel@WI-3-14:/tmp/openMMC$ cd Debug
pawel@WI-3-14:/tmp/openMMC/Debug$ cmake ../ -DBOARD=sayma -DBOARD_RTM=sayma -DTARGET_CONTROLLER=LPC1776 -DCMAKE_BUILD_TYPE=Debug
-- The C compiler identification is GNU 9.3.0
-- The CXX compiler identification is GNU 9.3.0
-- The ASM compiler identification is GNU
-- Found assembler: /usr/bin/cc
-- Check for working C compiler: /usr/bin/cc
-- Check for working C compiler: /usr/bin/cc -- works
-- Detecting C compiler ABI info
-- Detecting C compiler ABI info - done
-- Detecting C compile features
-- Detecting C compile features - done
-- Check for working CXX compiler: /usr/bin/c++
-- Check for working CXX compiler: /usr/bin/c++ -- works
-- Detecting CXX compiler ABI info
-- Detecting CXX compiler ABI info - done
-- Detecting CXX compile features
-- Detecting CXX compile features - done
CMake Warning at CMakeLists.txt:21 (message):
  No toolchain configuration file specified.  Using default option!

-- Build type: Debug
-- Selected Board: sayma
-- Selected RTM Board support: sayma
-- Selected Controller: LPC1776
-- Selected modules to compile: FRU;PAYLOAD;SDR;WATCHDOG;FPGA_SPI;HOTSWAP_SENSOR;EEPROM_AT24MAC;EEPROM_24XX64;LM75;MAX6642;ADT7420;INA219;RTM;UART_DEBUG;SENSORS;CLI;CUSTOM;PCF8574;ADT7420
-- Selected debug probe: LPCLink
CMake Warning at probe/lpclink.cmake:33 (message):
  crt_emu_cm3_nxp not found! Can't program the controller!
Call Stack (most recent call first):
  CMakeLists.txt:130 (include)

-- Configuring done
-- Generating done
-- Build files have been written to: /tmp/openMMC/Debug
Build project in MCUXpresso
Flashing firmware
Header flashing
The MMC can be upgraded by USB cable and NXP programmer (can be used other programmer but make sure that header shorts pins 3, 5, 9) using LPCXpresso/MCUXpresso, Flashmagic or any other software which can talk with NXP bootloader. The tested programmer is LPCLink V2. Flashing using programmer also allows to debug the CPU. Use openMMC.axf file for flashing with LPCXpresso/MCUXpresso.
Disable power on AMC
Disconnect programmer from USB
Connect ribbon cable
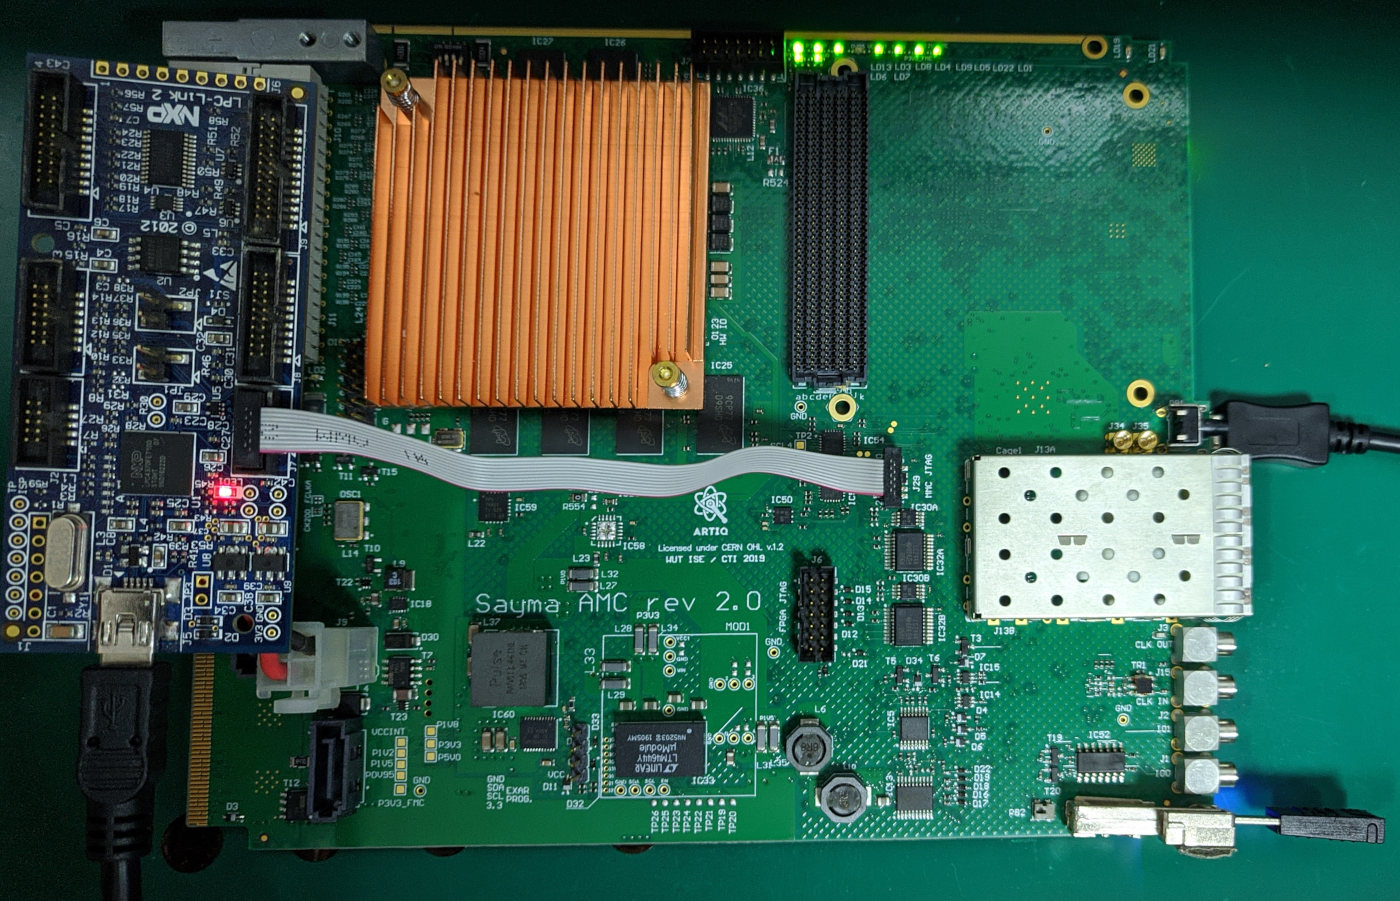
Connection of programmer to the board
Enable power on AMC
Connect programmer to USB
Flash
Select LPC_LINK2
Default flash driver = LPC177x_8x_407x_8x_256.cfx (select from file system), reset handling default, flash reset handling default
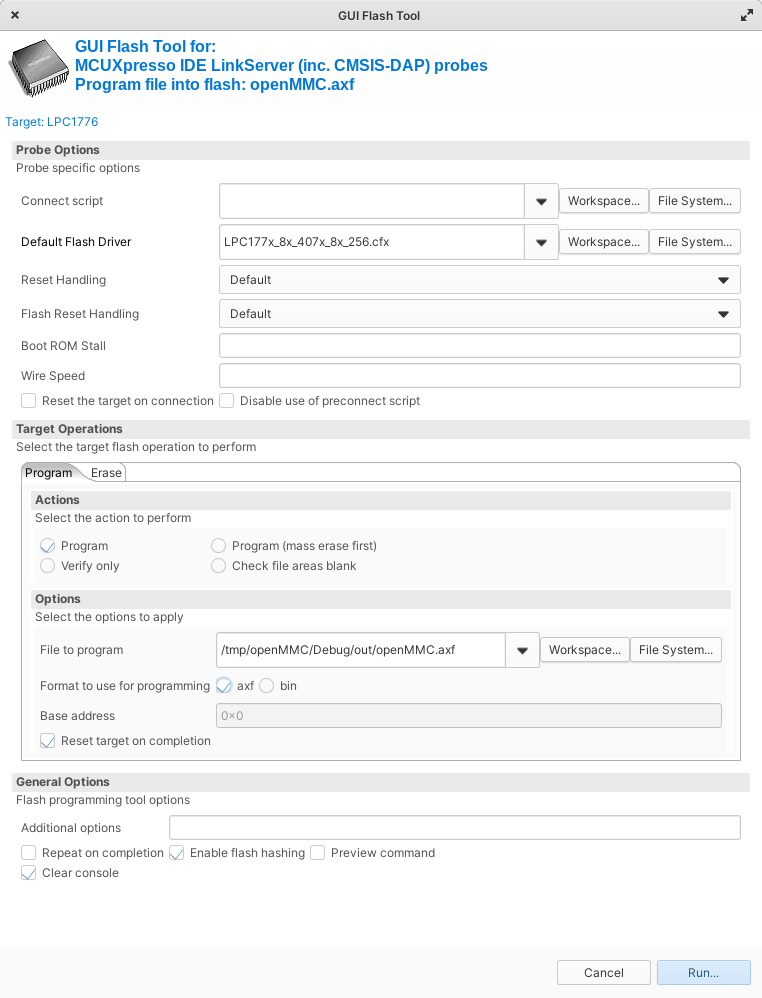
Run
Disconnect programmer from USB
Disable power on AMC
Disconnect ribbon
USB flashing
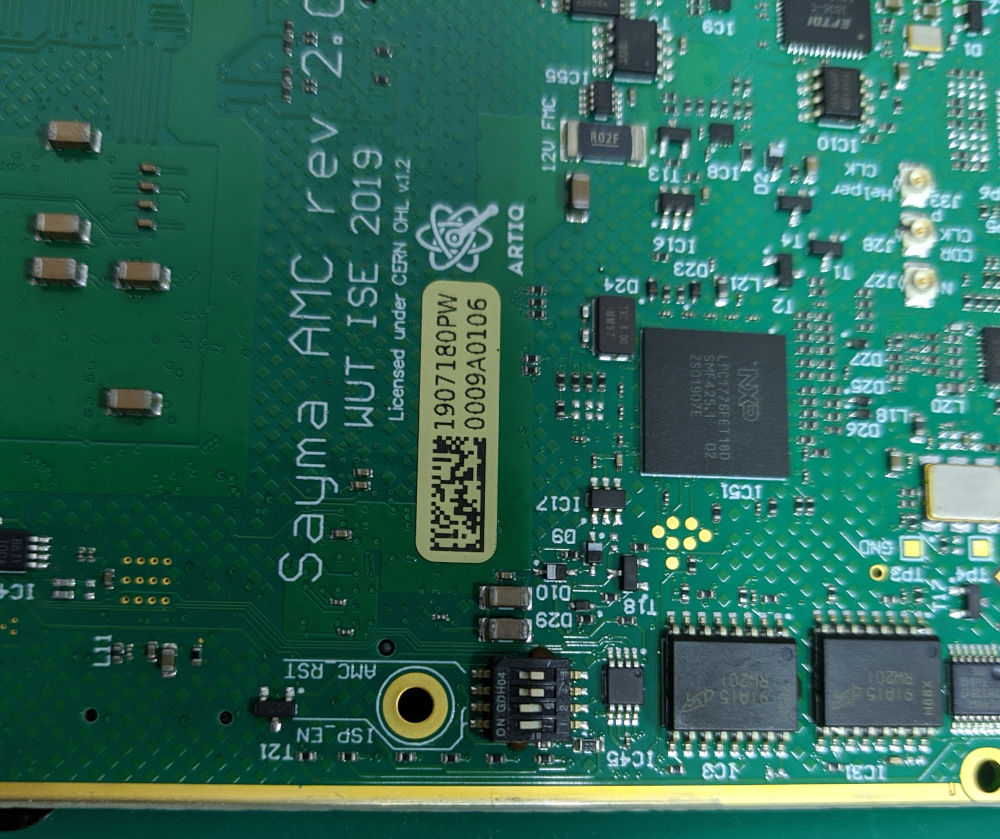
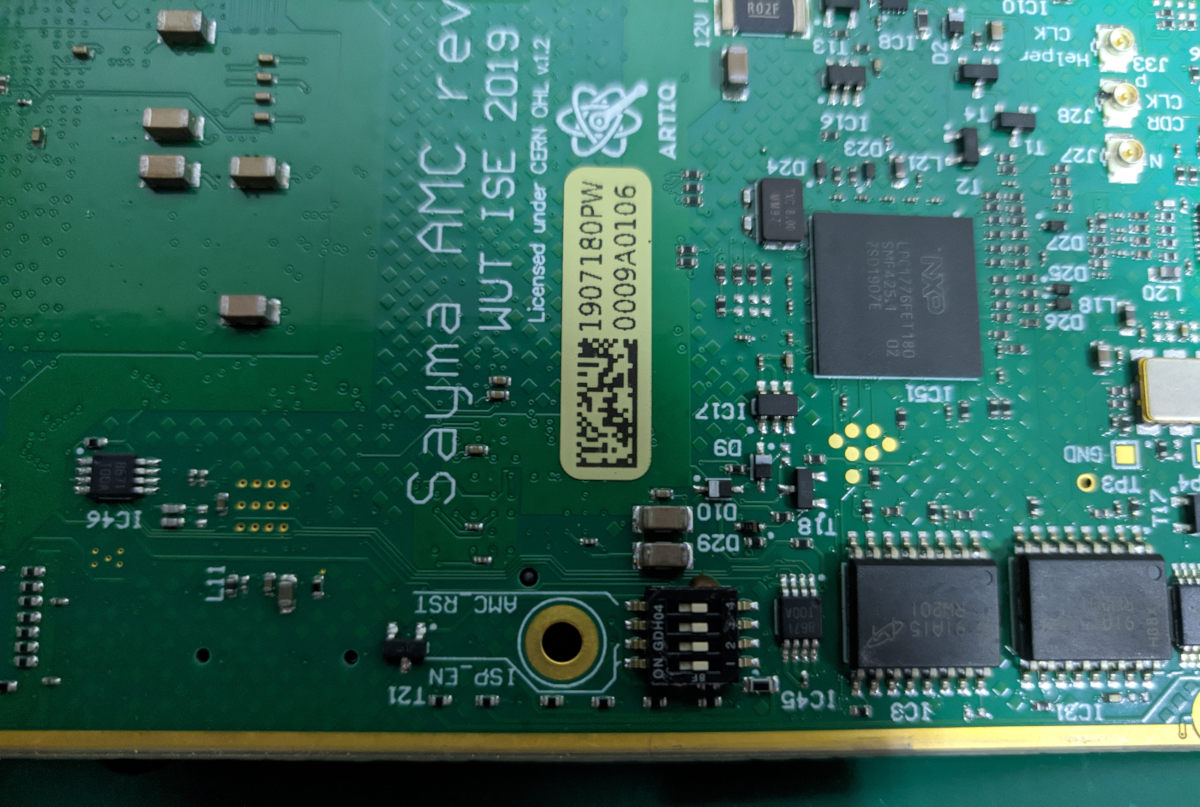
SW2 switch can be used to enable ISP mode of MMC processor. Enabling first and second switch allows to program the processor using USB. Enabling last switch allows to run the board outside of the crate. See Board overview for the location of the header (bottom view, call-out 1).
Run command arm-none-eabi-objcopy -I binary -O ihex /path/to/openMMC.bin /path/to/openMMC.hex
The MMC can be upgraded using USB and flashmagic software. This option only allows to flash IC, without any debug option.
Steps to flash using USB:
Set serial console 115200 8n1
Press front-panel button PB3 to trigger MMC to dump to serial console
Set SW2 first and second switches to “ON” position on Sayma AMC
Switch positions for USB programming
Set LPC1776
Select last serial port that appears after connecting Sayma via USB
Select baud 57600
Select enitre device for erase
Select hex file you generated earlier
Enable verify after programming
Press start

Flashmagic settings
Set SW2 switches to their original positions after flashing is done
Switch positions for normal operation
On linux tools such as mxli can be used to program MMC.
AMC connector flashing
JTAG lines of MMC are connected to AMC JTAG if no programmer is present and payload power is switched off (see JTAG section), so it should be possible to program MMC with JTAG Switch Module. However this wasn’t verified in practice.
Ethernet
Unlike in Sayma v1.0, MMC does not have access to Ethernet.